Installing a VPN on Mac takes less than 5 minutes using 3 steps: downloading the app from a verified source, dragging it to the Applications folder, and granting macOS permission prompts.
This guide covers selecting a VPN with native Apple Silicon support, navigating the download process safely, understanding each macOS permission prompt, and verifying the installation before connecting.
It is designed for beginner Mac users installing a VPN for the first time on a MacBook Air, MacBook Pro, iMac, or Mac Mini. Users ready to start immediately can [Install Mac VPN] now.
What to Know Before Installing a VPN on Mac
Installing a VPN on Mac requires evaluating 3 criteria before downloading: macOS compatibility, a verified no-logs policy, and native Apple Silicon support.
Criterion 1 — macOS Compatibility
macOS handles VPN connections through the NetworkExtension framework, which operates differently from Windows networking. A VPN built for macOS uses System Extensions running in user space rather than kernel extensions that interact directly with the operating system core. Providers like NordVPN, ExpressVPN, and ProtonVPN publish dedicated macOS apps updated for each major release, including Sequoia, Sonoma, and Ventura.
Criterion 2 — Verified No-Logs Policy
A no-logs policy confirms that the provider stores no records of browsing history, connection timestamps, or IP addresses. Independent audits by firms such as Cure53 and Deloitte verify these claims. Providers without published audit reports offer no verifiable proof that user data remains private after installation.
Criterion 3 — Native Apple Silicon Support
VPN apps on Mac exist in 3 architecture types: native ARM64 for M-series chips, Universal Binary for both Intel and Apple Silicon, and Intel-only apps requiring Rosetta 2 translation.
| Architecture | Compatible Chips | Performance | Battery Impact |
| Native ARM64 | M1 M2 M3 M4 | Highest | Optimal |
| Universal Binary | Intel and Apple Silicon | High | Minimal |
| Intel via Rosetta 2 | M-series with translation | Moderate | Higher drain |
Native ARM64 apps use hardware-accelerated AES-256 encryption built directly into Apple Silicon chips, including M1, M2, M3, and M4. Rosetta 2 translation adds processing overhead that increases CPU temperature and reduces battery life on fanless models like MacBook Air.
macOS Version Compatibility
macOS Sequoia places VPN settings in a dedicated sidebar section in System Settings. macOS Sonoma places VPN settings inside the Network category. macOS Ventura follows the same structure as Sonoma. Any VPN installed on Sequoia must handle rotating MAC addresses introduced in that version without breaking local network connectivity to devices like printers and routers.
Free vs Paid at Installation Level
Free VPN installers frequently omit 2 components that paid VPN installers include: privileged helper tools that enable a system-level kill switch and background daemons that manage auto-updates. Some free VPN installation bundles contain third-party tracking SDKs from companies like Adjust and AppsFlyer that begin collecting device data before the first connection is established.
For a complete breakdown of what free VPN installations risk on Mac, read Disadvantages of Free VPN on Mac.
Where to Download a VPN for Mac Safely
VPN downloads for Mac come from 3 sources: the provider’s official website, the Mac App Store, and third-party download sites.
Official Website vs Mac App Store
The official website version of a VPN app provides more complete features than the Mac App Store version on every major provider, including NordVPN, ExpressVPN, and ProtonVPN.
The Mac App Store requires all apps to operate inside Apple’s sandboxing system. Sandboxing restricts an app’s access to system-level processes. This restriction prevents App Store VPN versions from implementing 2 critical features: split tunneling and a system-level kill switch. Both features require direct access to macOS core networking processes that are sandboxed.
The official website version uses the NetworkExtension framework to create a system-wide encrypted tunnel with full access to features like split tunneling, auto-connect on untrusted networks, and system-level kill switch protection.
For most Mac users, downloading from the official provider website produces a more secure and feature-complete installation than the App Store version.
DMG vs PKG File Types
VPN installers downloaded from official websites arrive in 2 formats: DMG and PKG.
A DMG file is a disk image that mounts like a virtual drive. Opening it displays the app icon and an Applications folder shortcut. The installation completes by dragging the app icon into the Applications folder.
A PKG file runs an installer wizard. It guides the user through license agreements and installs privileged helper tools and background daemons that require administrator-level permissions. PKG installers are used when the VPN requires a system-level kill switch that operates through the macOS packet filter.
Running the app directly from the DMG window without dragging it to the Applications folder causes the app to lose settings and fail to update after the DMG unmounts.
Third-Party Download Sites
Third-party repositories, including sites like Softonic, MacUpdate, and CNET Downloads, frequently host repackaged VPN installers. These repackaged files bypass the digital signature verification that macOS relies on for security. Hidden scripts inside repackaged DMG files execute during installation and install keyloggers, adware, and data collection tools without visible prompts.
Download VPN installers exclusively from the provider’s official domain or the Mac App Store. Both sources guarantee the installer carries a valid Apple notarization ticket.
Gatekeeper Warning
Gatekeeper checks every downloaded app for 2 things: a valid Developer ID signature and an Apple notarization ticket. When macOS displays “the app cannot be opened because it is from an unidentified developer,” it indicates the installer lacks one of these 2 verifications.
This warning appears legitimately when a provider releases a new build that has not yet completed Apple’s notarization review. To proceed safely, open System Settings, navigate to Privacy and Security, and click Open Anyway. This button remains active for exactly 1 hour after the block occurs. If the warning appears on a file downloaded from a third-party site, do not proceed; delete the file immediately.
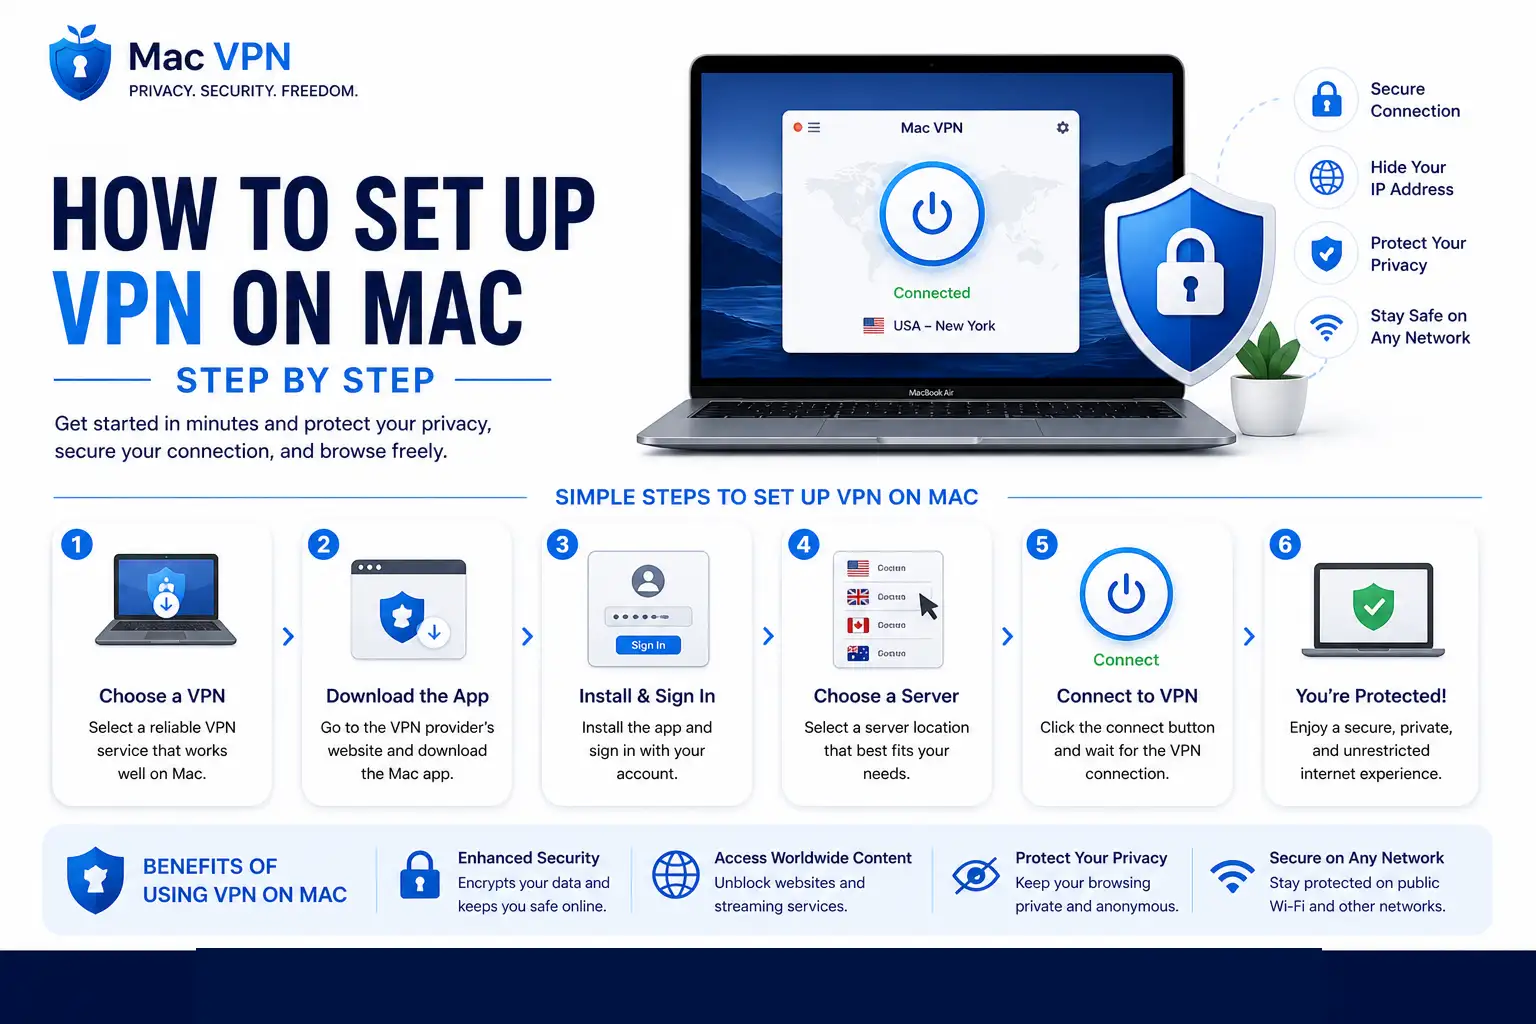
H2: How to Install VPN on Mac Step by Step
Installing a VPN on Mac using the app-based method completes in 5 steps and takes less than 5 minutes on MacBook Air, MacBook Pro, iMac, and Mac Mini.
Step 1 — Open the DMG File and Drag to Applications
Double-click the downloaded DMG file to mount it. A window opens showing the VPN app icon and an Applications folder shortcut. Drag the VPN app icon directly into the Applications folder shortcut inside the DMG window. Do not double-click the app icon inside the DMG. Running the app from inside the DMG causes settings loss and prevents automatic updates after the DMG is unmounted.
Step 2 — Open the App from Applications or Launchpad
Navigate to the Applications folder in Finder or open Launchpad and locate the VPN app. Click to open it. macOS displays a confirmation prompt stating that the app was downloaded from the internet. Click Open to proceed. This prompt is a standard Gatekeeper check and appears on every app downloaded outside the Mac App Store.
Step 3 — Grant macOS Permission Prompts
The app requests system permissions on first launch. Grant all permission prompts that appear during this step. Denying any prompt prevents the VPN from creating an encrypted tunnel on the Mac. A full explanation of each prompt appears in the section below.
Step 4 — Create Account or Log In
Enter your account credentials in the app. Providers, including NordVPN, ExpressVPN, and Windscribe, use email and password combinations. ProtonVPN offers a username and password format. Some providers, including ExpressVPN, send an activation link by email that completes login automatically on the Mac after clicking the link on any device.
Step 5 — Verify Installation Before Connecting
Confirm 3 indicators before clicking Connect. The VPN app icon appears in the Applications folder. The VPN configuration appears in System Settings under Network or the VPN sidebar in Sequoia. The menu bar shows the VPN status icon when the app is open. All 3 indicators confirm a complete installation.
For full configuration instructions after installation, including server selection, protocol settings, and kill switch activation, read How to Set Up VPN on Mac.
What Each macOS Permission Prompt Means During Installation
VPN apps on Mac trigger 3 permission prompts during first launch: Allow VPN Configurations, Local Network Access, and System Extension approval.
Allow VPN Configurations
Allow VPN Configurations grants the app permission to interact with neagent the Network Extension Agent, which is the macOS system process that creates and maintains the encrypted VPN tunnel. Without this permission, the app installs correctly but cannot route any traffic through an encrypted connection. The VPN becomes non-functional regardless of account status or server selection.
Local Network Access
Local Network Access allows the VPN app to detect and communicate with devices on the same WiFi network, including printers, NAS drives, and smart home devices like Apple TV and HomePod. VPN apps use this permission to identify trusted networks and enable split tunneling for local devices. Denying this permission does not break the core VPN tunnel but disables local network features and trusted network detection.
System Extension
Some VPN protocols including WireGuard and IKEv2, install a system extension during setup. macOS blocks system extensions by default and requires manual approval. To approve a system extension, open System Settings, navigate to Privacy and Security, scroll to Security, and click Allow next to the blocked extension name. The Mac requires a restart after approving a system extension for the change to take effect.
Re-enabling Denied Permissions
Denied permissions do not require reinstallation in most cases. Open System Settings and navigate to Privacy and Security. Toggle Local Network back on for the VPN app. Navigate to Network and confirm the VPN configuration is listed. If the VPN configuration is missing after a denied Allow VPN Configurations prompt, uninstall the app completely and reinstall it to trigger the permission prompt again.
How to Verify VPN Installation Was Successful
A successful VPN installation on Mac produces 3 confirmable indicators before the first connection.
Checklist:
1. App icon appears in the Applications folder and Launchpad — not just in the Downloads folder or DMG window
2. VPN configuration appears in System Settings under Network on macOS Sonoma and Ventura, or under the dedicated VPN sidebar section on macOS Sequoia
3 . Menu bar shows the VPN status icon when the app is open — the icon confirms the NetworkExtension is active and ready to create a tunnel
All 3 indicators confirm a complete and functional installation. A missing VPN configuration in System Settings indicates the Allow VPN Configurations permission was denied during installation.
Basic IP Check
Run a basic IP check to confirm the VPN is ready to protect traffic before connecting to a server.
Step 1 — With the VPN disconnected, search “what is my IP” in Safari or Chrome and note the displayed city and IP address.
Step 2 — Connect to the VPN and select a server in a different country, such as Germany, Japan, or Iceland.
Step 3 — Refresh the IP check page. A successful installation displays the VPN server’s city and IP address instead of the real location.
A mismatch between the displayed IP and the selected server location indicates a routing issue requiring reinstallation.
Installing VPN on Specific Mac Models and macOS Versions
MacBook Air, MacBook Pro, iMac, and Mac Mini
VPN installation on Mac follows the same 5-step process across all models: MacBook Air, MacBook Pro, iMac, and Mac Mini, with performance differences determined by chip generation.
MacBook Air M1, M2, M3 — Native Apple Silicon apps from providers like NordVPN, ProtonVPN, and ExpressVPN install without Rosetta 2 translation. The M3 chip uses a 3nm process that produces zero perceived impact from AES-256 encryption during VPN operation. Fanless MacBook Air models maintain normal temperatures under sustained VPN connections using native apps.
MacBook Pro M3, M4 — Same installation process as MacBook Air. The M4 chip delivers 20% to 25% faster single-core performance than M3, producing faster VPN handshake times when establishing connections to servers in locations like the United States, Germany, and Japan.
iMac and Mac Mini — The installation process is identical to MacBook models. Both support the same native Apple Silicon apps and follow the same System Settings permission flow.
Intel Mac — Download the Universal Binary or Intel-specific version of the VPN installer. Installing an ARM64-only build on an Intel Mac produces an error stating the app is not supported on this architecture. Check the provider’s download page for architecture options before downloading.
macOS Sequoia and Sonoma Installation Notes
VPN settings appear in different locations across macOS versions, requiring different navigation paths to complete installation and approve system extensions.
| macOS Version | VPN Location | Extension Approval Path |
| Sequoia 15 | System Settings — VPN sidebar | Privacy and Security — Security |
| Sonoma 14 | System Settings — Network — VPN | Privacy and Security — Security |
| Ventura 13 | System Settings — Network — VPN | Privacy and Security — Security |
macOS Sequoia places VPN in a dedicated sidebar section separate from Network settings. Sequoia also introduces rotating MAC addresses and stricter Local Network Access prompts. VPN apps installed on Sequoia require an update specifically addressing these frameworks to avoid breaking connectivity to local devices like printers and Apple TV.
macOS Sonoma places VPN settings inside the Network category. Click the info button next to the network service to access advanced VPN configuration options.
Both Sequoia and Sonoma require manual approval of system extensions in Privacy and Security. A notification stating a system extension was blocked requires the user to click Allow in Privacy and Security and restart the Mac before the extension activates.
Common VPN Installation Problems on Mac and How to Fix Them
VPN installation on Mac produces 5 common problems, each with a direct fix requiring no technical expertise.
Problem 1 — Gatekeeper Blocks the VPN Installer
Symptom: macOS displays “the app cannot be opened because it is from an unidentified developer.”
Fix: Open System Settings, navigate to Privacy and Security, scroll to the Security section, and click Open Anyway next to the blocked app name. This button remains active for 1 hour after the block occurs. Enter the admin password when prompted. This fix applies only to installers downloaded from the official provider website. Delete and do not open installers showing this warning from third-party download sites.
Problem 2 — System Extension Blocked
Symptom: A notification appears stating that a system extension was blocked from loading.
Fix: Open System Settings, navigate to Privacy and Security, scroll to Security, and click Allow next to the blocked extension. Restart the Mac after clicking Allow. The system extension activates only after a full restart. Providers, including NordVPN, ExpressVPN, and Surfshark, use system extensions for WireGuard and IKEv2 protocol support on macOS Sequoia and Sonoma.
Problem 3 — App Does Not Appear in Applications After DMG
Symptom: The VPN app disappears after restarting the Mac.
Fix: The app was run directly from inside the DMG window without being dragged to the Applications folder. Reopen the DMG file, drag the app icon into the Applications folder shortcut, and relaunch from Applications or Launchpad.
Problem 4 — VPN Configuration Permission Denied
Symptom: The VPN connects in the app, but no traffic is encrypted, and the IP address does not change.
Fix: Open System Settings, navigate to Network, and check whether the VPN configuration is listed. If missing, uninstall the app completely using the provider’s official uninstaller, reinstall from the official website, and grant the Allow VPN Configurations prompt on first launch.
Problem 5 — Mac Asks for Admin Password Repeatedly
Symptom: macOS repeatedly requests the admin password during or after installation.
Fix: This prompt occurs because the VPN installer is deploying a privileged helper tool, a background process that enables the system-level kill switch without requiring password entry on every connection. Enter the admin password once to authorize the helper tool. If the prompt repeats after authorization, download the PKG installer directly from the provider’s official website and reinstall, as the PKG format correctly registers the helper tool with macOS.
How to Install a VPN Extension on Mac Browsers
VPN extensions on Mac install in 3 steps on Chrome and Firefox, but are unavailable on Safari, which requires the full macOS VPN app.
Chrome VPN Extension Installation
- Open Chrome and navigate to the Chrome Web Store
- Search for the VPN provider name NordVPN, ExpressVPN, or Windscribe
- Click Add to Chrome, confirm by clicking Add Extension, then sign in through the extension pop-up
Firefox VPN Extension Installation
- Open Firefox and navigate to the Firefox Add-ons Store at addons.mozilla.org
- Search for the VPN provider extension and click Add to Firefox
- Confirm the permission request and sign in through the extension menu
Safari Note
Safari does not support VPN extensions. Apple’s Safari extension architecture uses Web Extensions and Content Blockers, neither of which supports VPN tunnel creation. Some providers label Safari companion tools as extensions, but these function as remote controls for the full Mac app rather than standalone VPN connections. Installing and running the full macOS VPN app is the only method that provides VPN protection in Safari.
Browser Extension vs Full App
A browser extension VPN protects only traffic inside that specific browser. Apps like Mail, Slack, FaceTime, Zoom, and App Store downloads transmit data outside the browser tunnel without encryption.
The full macOS VPN app encrypts all system traffic across every app simultaneously using the NetworkExtension framework.
Use a browser extension when access to a single geo-blocked website is needed on a shared computer where installing software is restricted. Use the full app for all other scenarios, including public WiFi protection, privacy from ISPs, and system-wide encryption on MacBook Air, MacBook Pro, iMac, and Mac Mini.
For a detailed guide on installing and configuring VPN extensions specifically for Chrome on Mac, read [Chrome VPN Extension for Mac].
Frequently Asked Questions
Q: Can I Install a VPN on My Mac for Free
A: Yes. Providers, including ProtonVPN, Windscribe, and PrivadoVPN, offer free installation with no payment required. ProtonVPN’s free tier provides unlimited data across 3 server locations. Windscribe provides 10GB of monthly data across servers in 10 countries. Free installations from unknown providers without published privacy policies carry data logging and malware risks detailed in the Disadvantages of Free VPN on Mac guide.
Q: Does Installing a VPN Slow Down My Mac
A: Installing a VPN does not slow down the Mac itself. Connecting to a VPN server reduces raw download speeds by 10% to 20%, depending on server distance and protocol. On M1, M2, M3, and M4 chips, hardware-accelerated AES-256 encryption produces no measurable CPU or battery impact during VPN operation. The speed reduction comes from routing traffic through an additional server, not from the installation itself.
Q: Can I Install Multiple VPNs on a Mac at the Same Time
A: Multiple VPN apps can be installed on a Mac simultaneously without conflict. Running 2 or more VPN apps at the same time creates a routing conflict where both apps attempt to control network traffic, resulting in no internet access. Install multiple VPN apps for comparison testing, but activate only 1 at a time.
Q: What Happens if I Deny Permissions During VPN Installation
A: Denying the Allow VPN Configurations prompt prevents the app from creating an encrypted tunnel. The VPN app opens and appears functional, but routes zero traffic through encryption. Re-enable the permission by opening System Settings, navigating to Privacy and Security, and toggling the VPN app back on. If the VPN configuration is missing from Network settings, uninstall and reinstall the app to trigger the permission prompt again.
Q: How Long Does VPN Installation Take on a Mac
A: VPN installation on Mac takes less than 5 minutes from download to first connection on standard broadband connections above 10 Mbps. The download completes in under 2 minutes for app sizes between 50MB and 150MB. The installation, permission-granting, and account login steps take an additional 2 to 3 minutes.
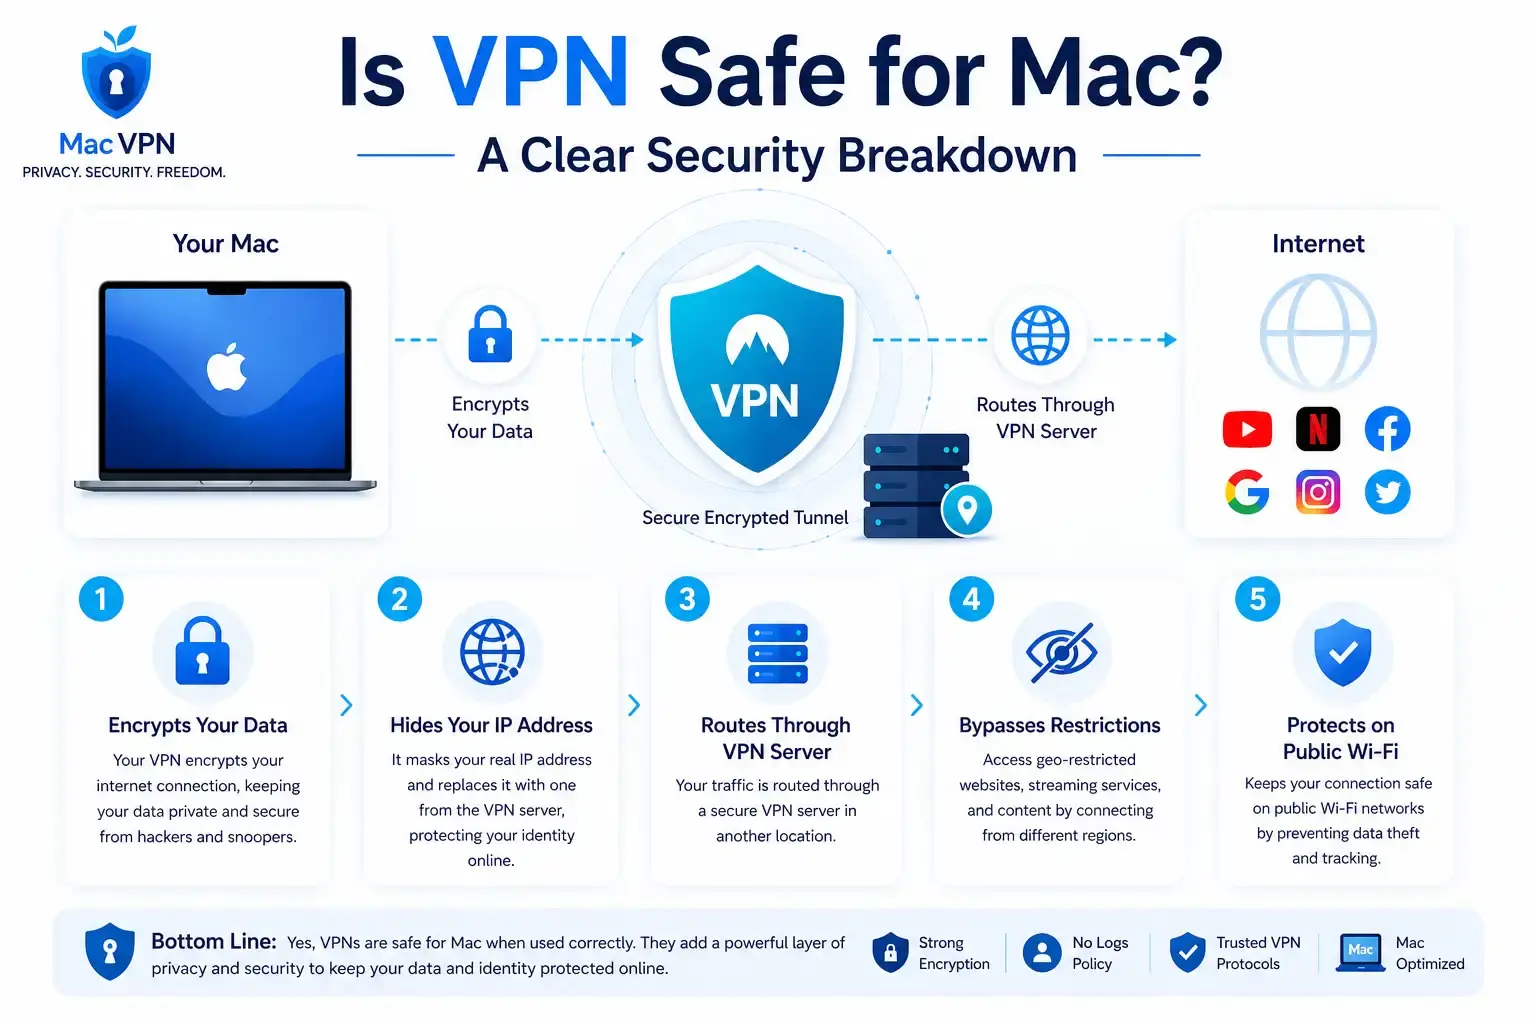
Q: Is It Safe to Install a VPN on a Mac
A: VPN apps from audited providers, including NordVPN, ExpressVPN, ProtonVPN, and Surfshark, are safe to install on Mac. These providers use System Extensions operating in the user space, which prevents system-wide crashes and deep-level exploitation. For a complete evaluation of VPN safety standards on Mac, read Is VPN Safe for Mac.